
.avif)

3. Landing Page vs. Contact Card
It’s important to note that the information shared by your personal landing page (what your contacts see when the card is tapped) may differ from the information on the contact card (what your contacts download).
You can control what your landing page shares by adding content, as shown before, and using the toggle buttons next to each link. By turning the toggle on, the contact will be shown on the landing page and shared on the contact card.
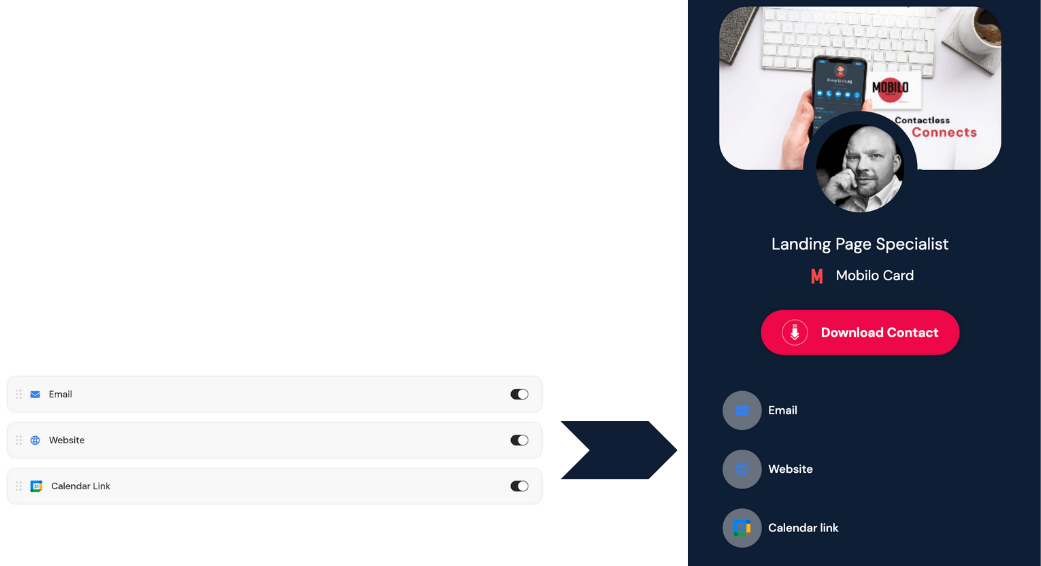
But keep in mind that turning the toggles off will hide the content from the landing page, but it will still be shared on the contact card.

