🎁 Limited Time 50% Discount on Custom Metal Cards.
💵 Ends Soon: 75% off cards + Pro free
Shop now →
+1 (929) 421-1300
Don’t leave without 75% off
Get a Mobilo Branded Card for $5 or a Custom Card for $10
Plus 90 days of Pro free.
.avif)

Get a Mobilo Branded Card for $5 or a Custom Card for $10
Plus 90 days of Pro free.
Mobilo offers an Active Directory integration feature exclusively for Microsoft Azure users. This step-by-step guide will walk you through setting up Active Directory integration, enabling you to efficiently manage tasks such as ordering new cards, updating employee information, and off-boarding employees.
Step 1: Check Account Permissions
Please keep in mind that in order to complete the syncing process, you will need to be an Admin in Mobilo as well as a Global administrator on Azure.
To learn more about assigning admin privileges on the Mobilo App, please click here.
Step 2: Log In to Your Mobilo App Account
Visit app.mobilocard.com, log in to your Mobilo account, and navigate to the Integrations Menu.
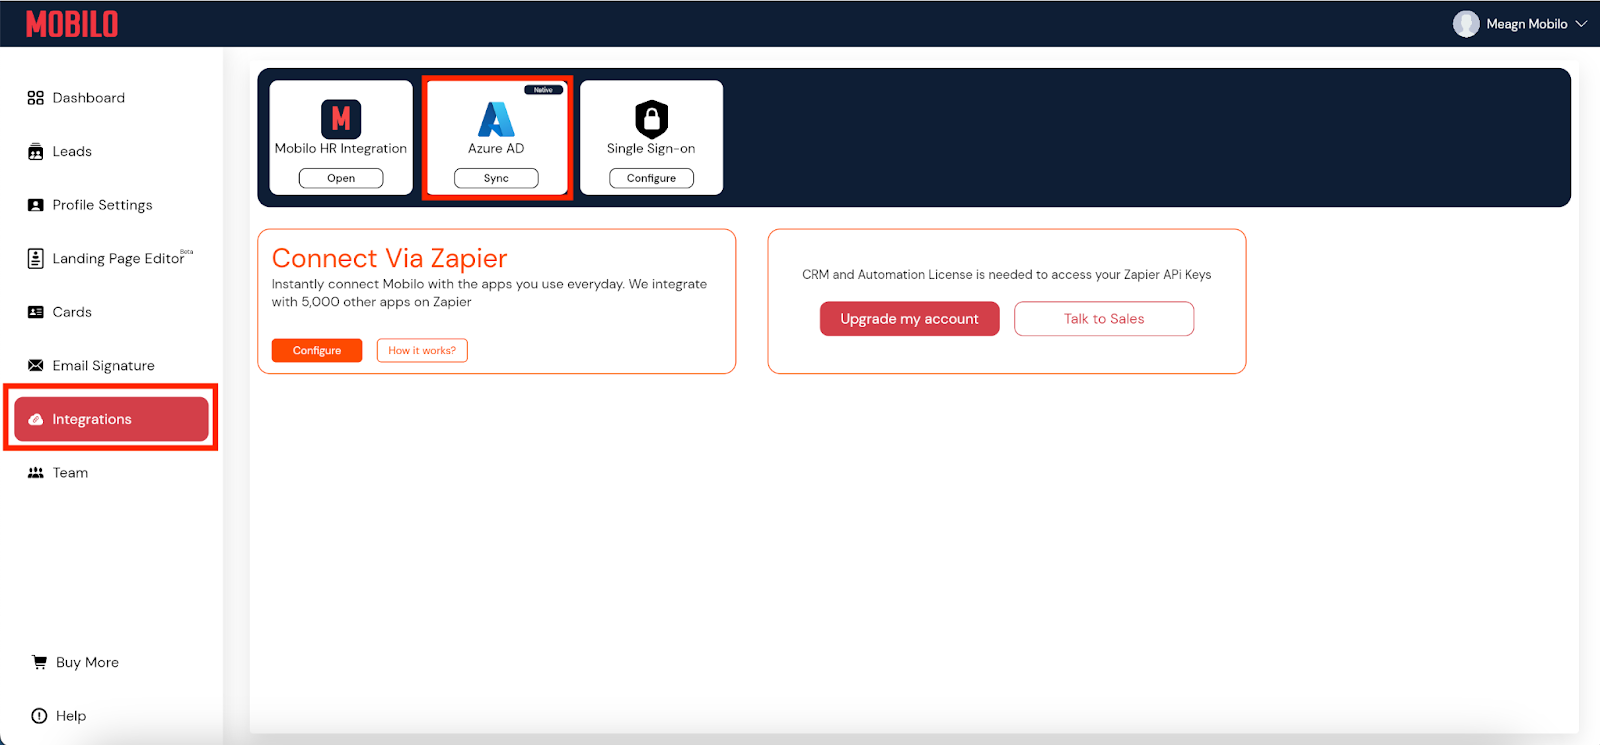
Locate the Azure AD section and click the "Open" button.
Step 3: Log In to the Mobilo HR Portal
After clicking the “Open” button, a new window should open, asking you to log in. Use the same credentials for your Mobilo Account and hit the "Log In" button.
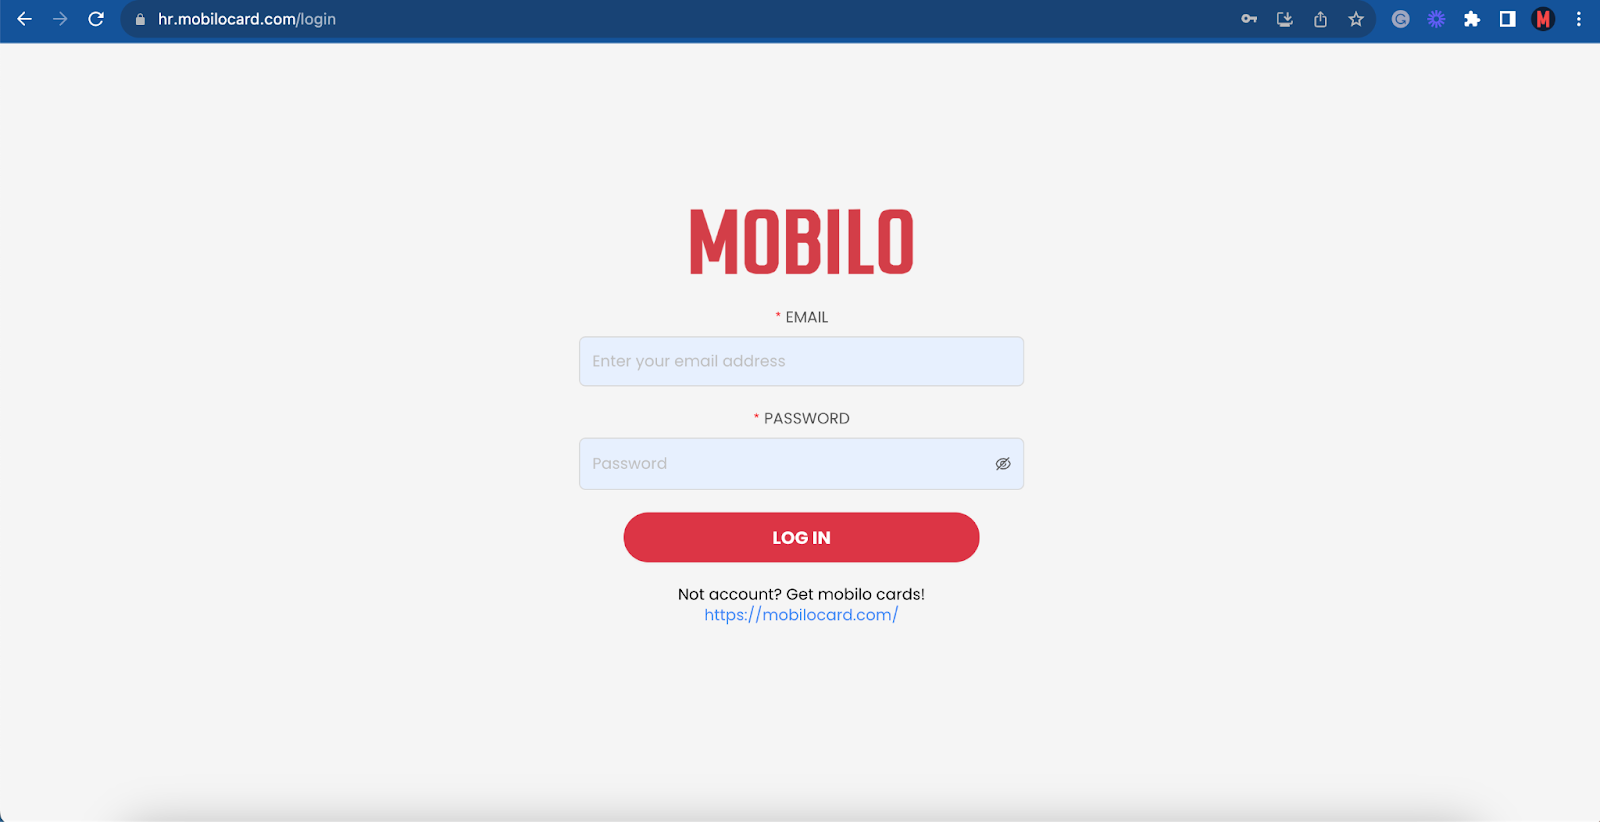
*For clients using SSO, please remember that this portal has separate credentials; if you don’t remember the password, reset your Mobilo password from the app by following the steps in this link.
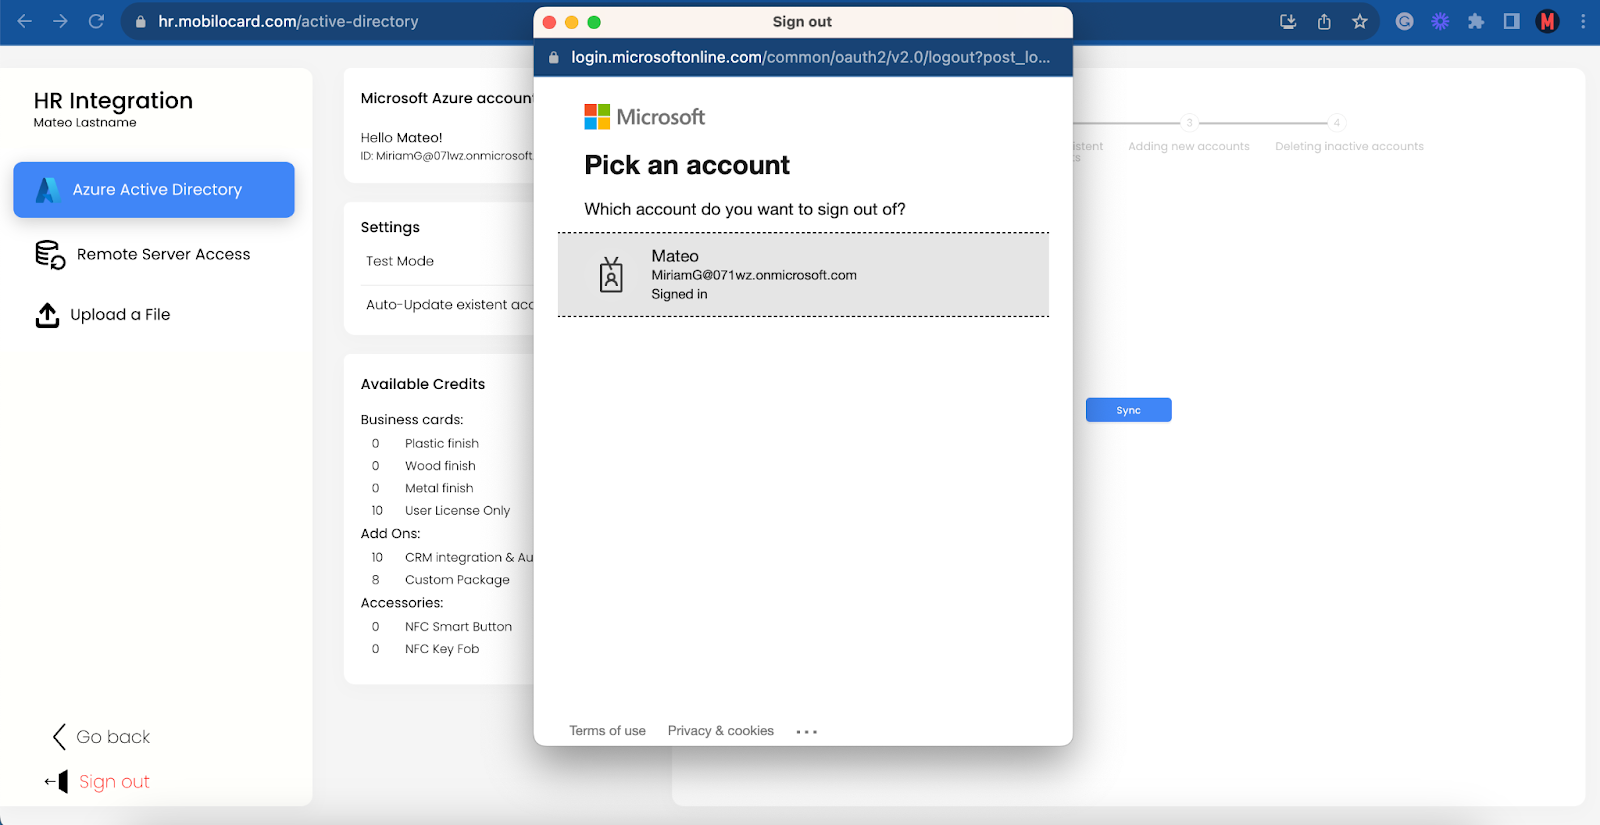
Step 4: Sign In to Your Microsoft Account
Once you are in, locate the Azure Menu on the left-hand side panel and click the blue “Sign In” button.
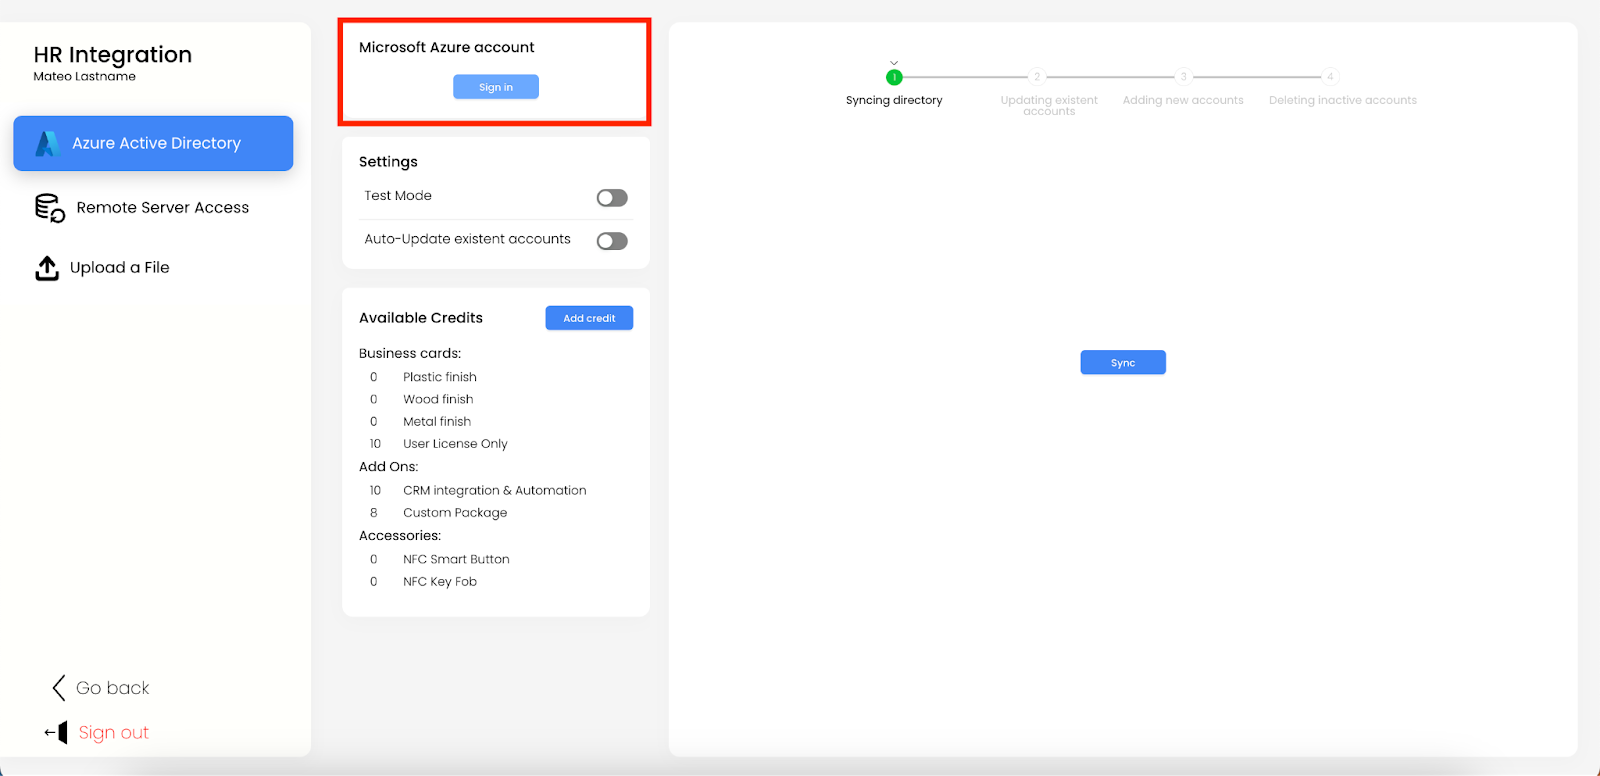
You will be prompted to sign in with your Microsoft account.
Step 5: Credits
Please note that we use a credit-based system for ordering cards and setting up new accounts. Each credit is equivalent to one card, so ensure you have the necessary credits (of the desired card material) before starting the sync.
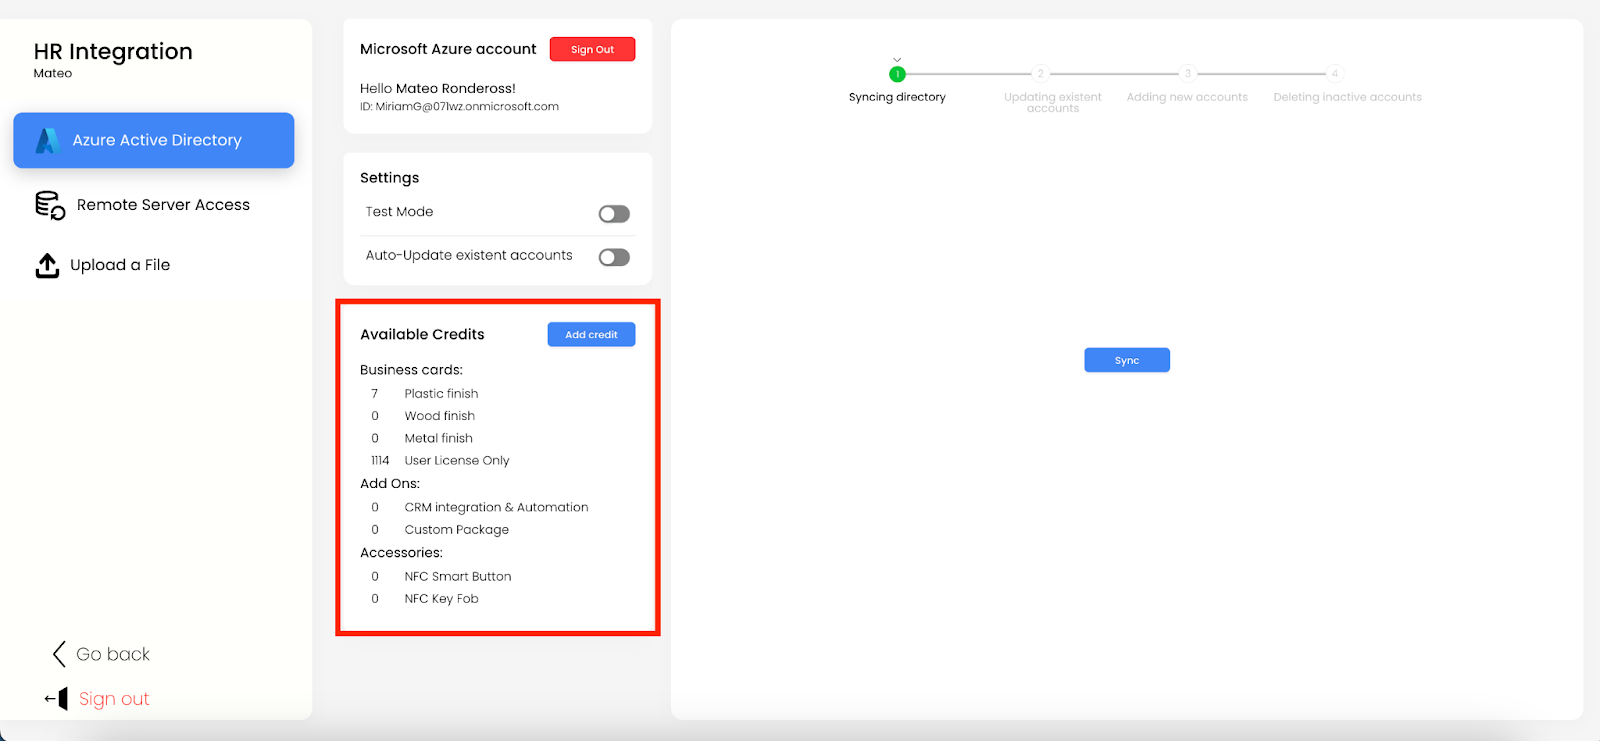
If you need to add more cards to your account, click the "Add Credits" button and place a new order. Once the order is placed, you will see the available credits in this section of the HR portal.
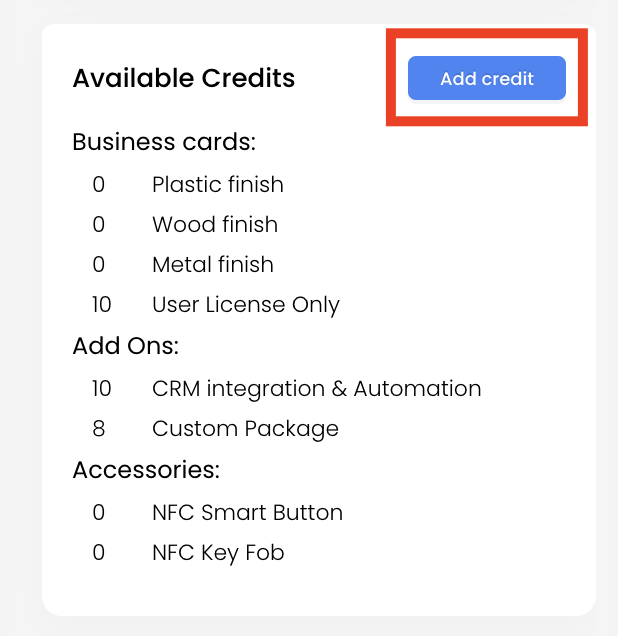
*The same applies to our CRM and Custom Digital Package (landing page) license add-ons and accessories.
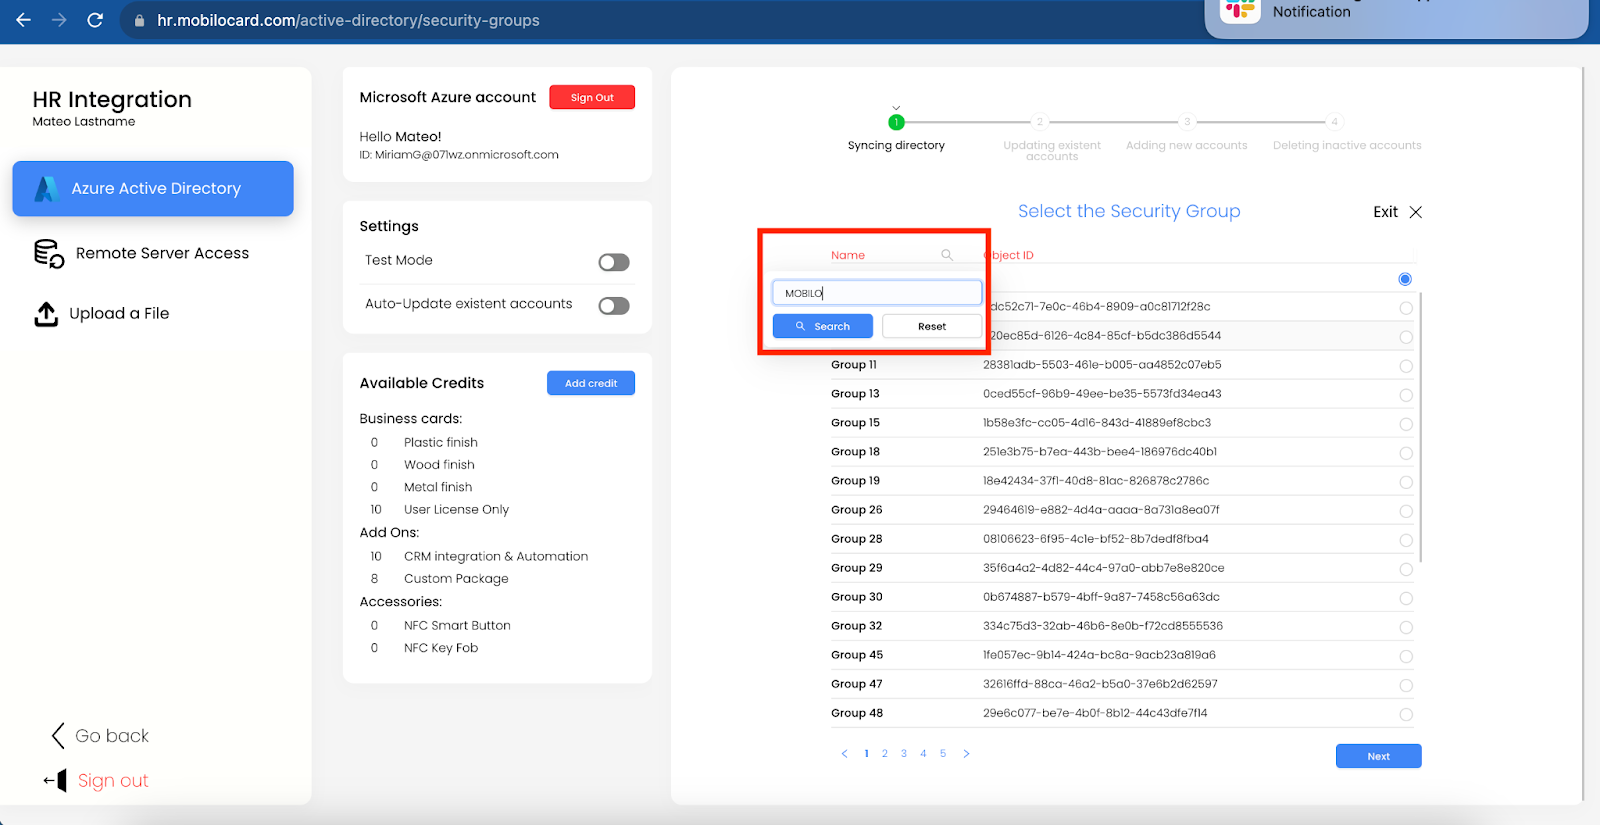
Step 6: Initiate Sync
Once you have checked your credits, hit the "Sync" button. Our system will connect with your directory and display all security groups. Utilize the magnifying glass icon at the top to search if you want to sync a specific group or select all groups and click “Next” to continue to the next step.
Step 7: Updating Existing Accounts
In this phase, our system will present you with a list of existing accounts that have been updated. You have the flexibility to choose individual members or select all members on the page. Click the "Update and Continue" button and await the synchronization completion.
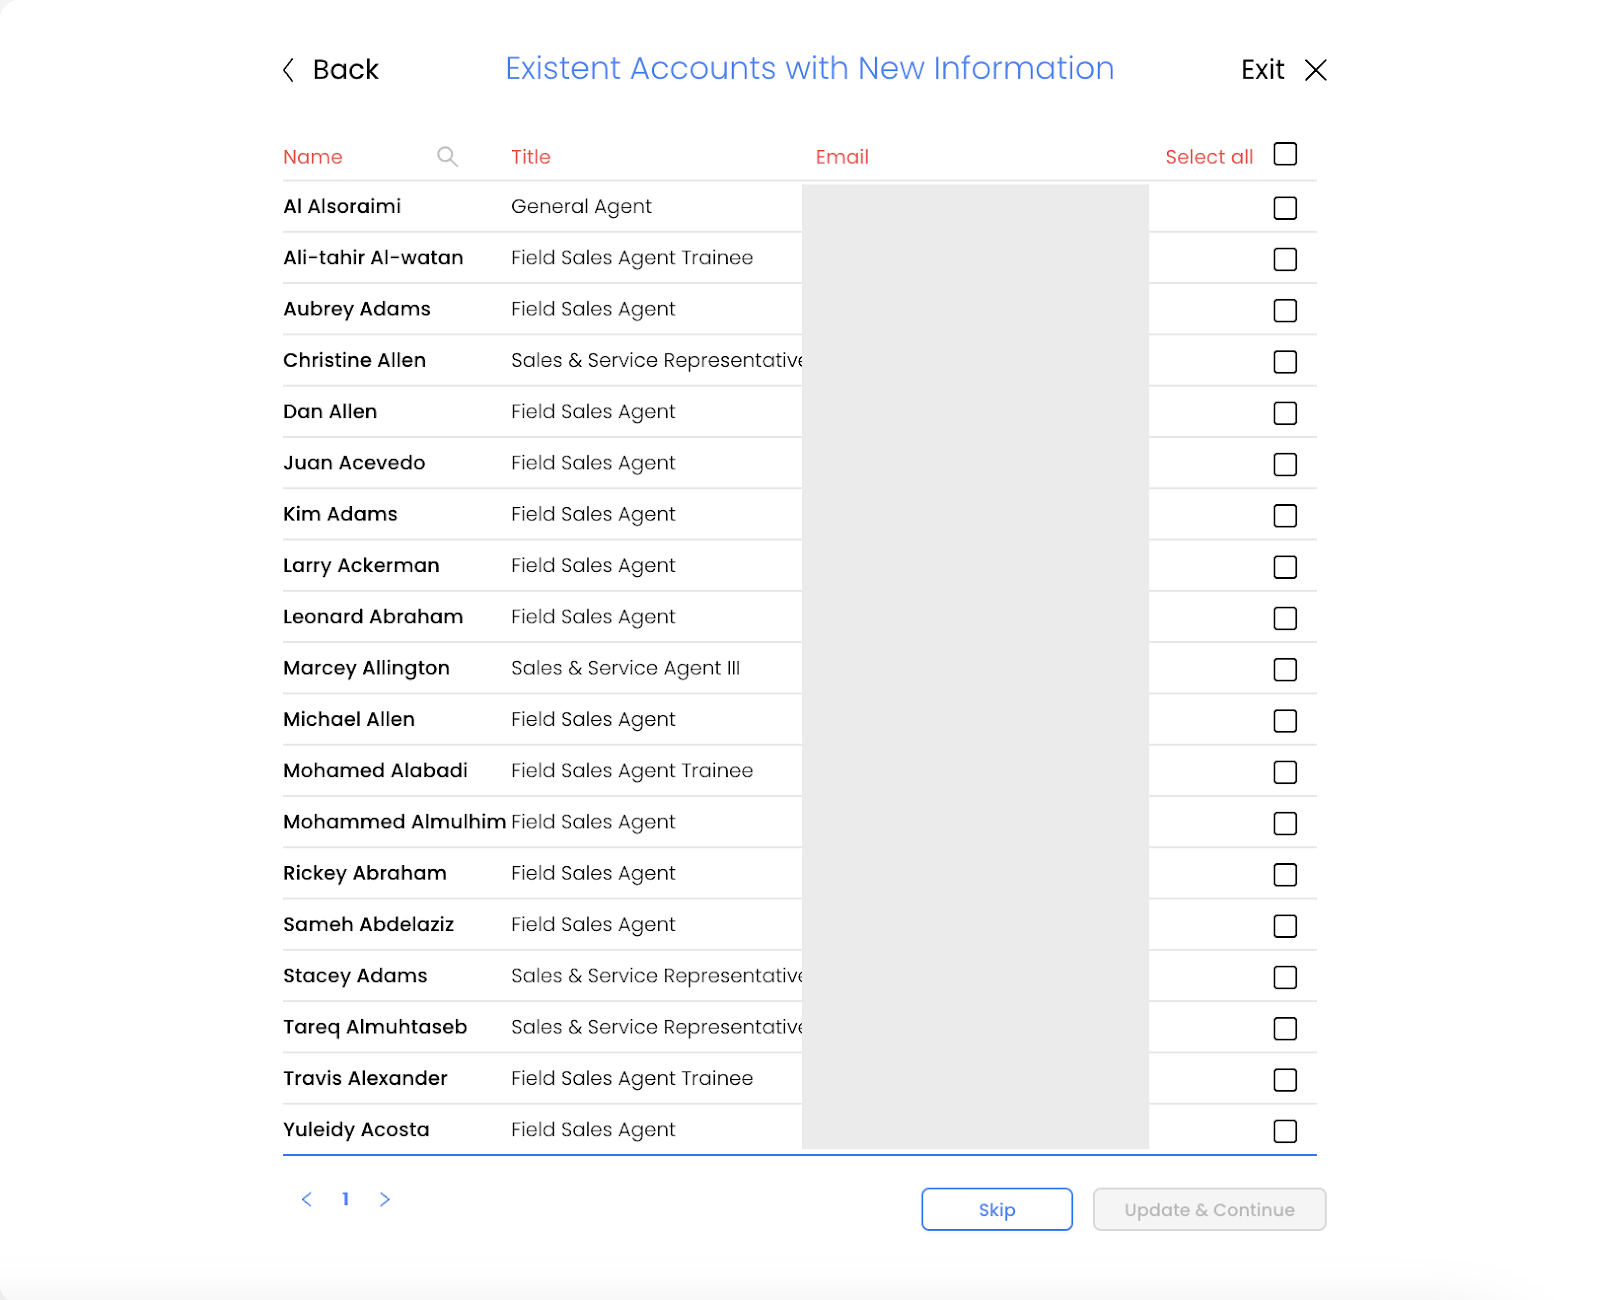
Note: If you have multiple pages, you must repeat this process for each page.*
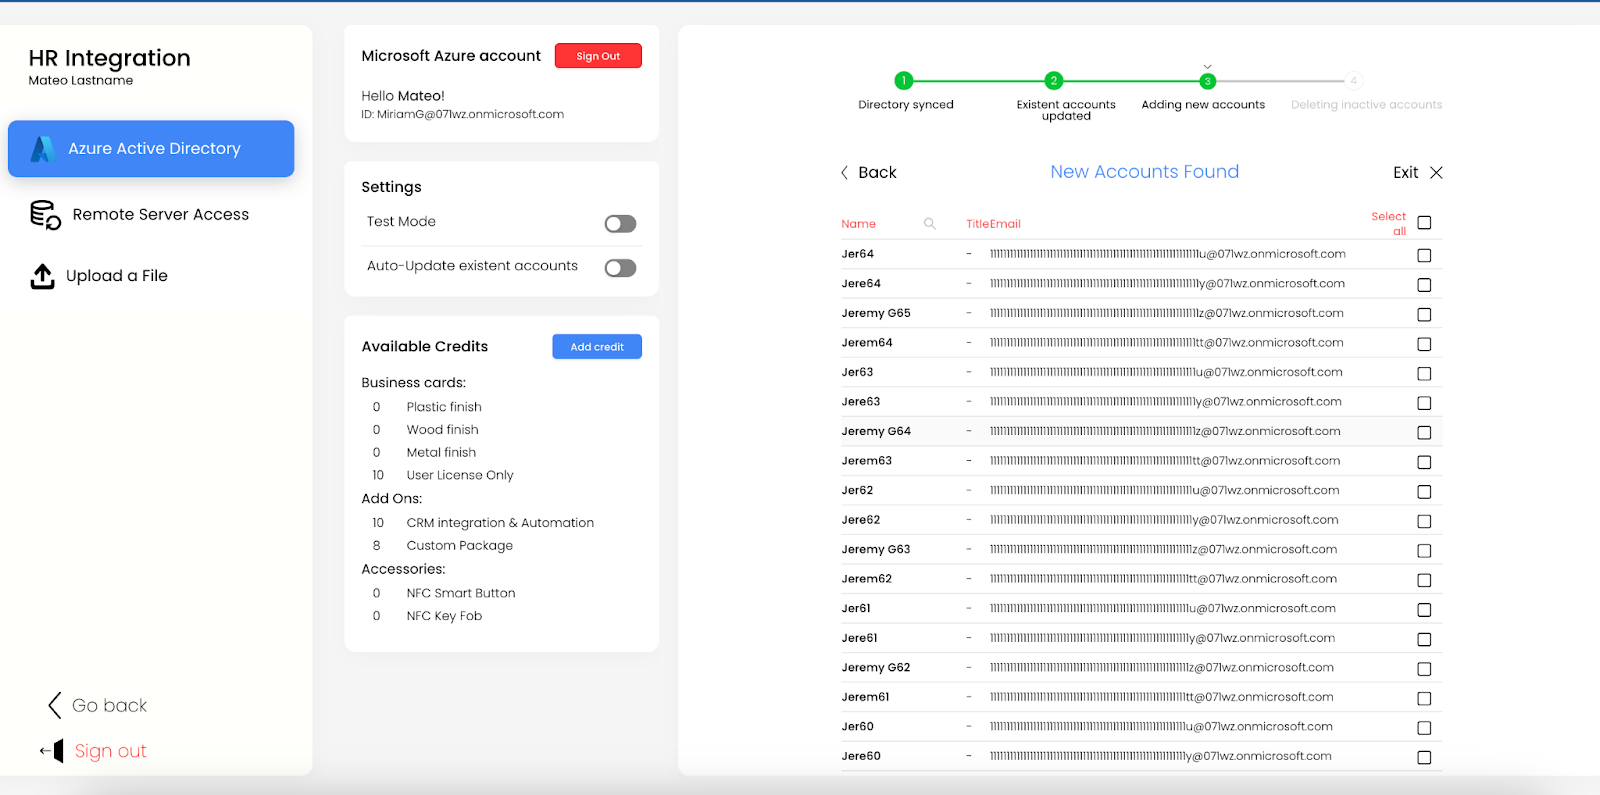
Step 8: Adding New Users
During this step, our system will highlight newly added accounts in your directory:
This is where you can create accounts and request cards for your team. Please remember that you must purchase Cards and Licenses for each new user.
Select the desired accounts from the list and click the "Add" button.
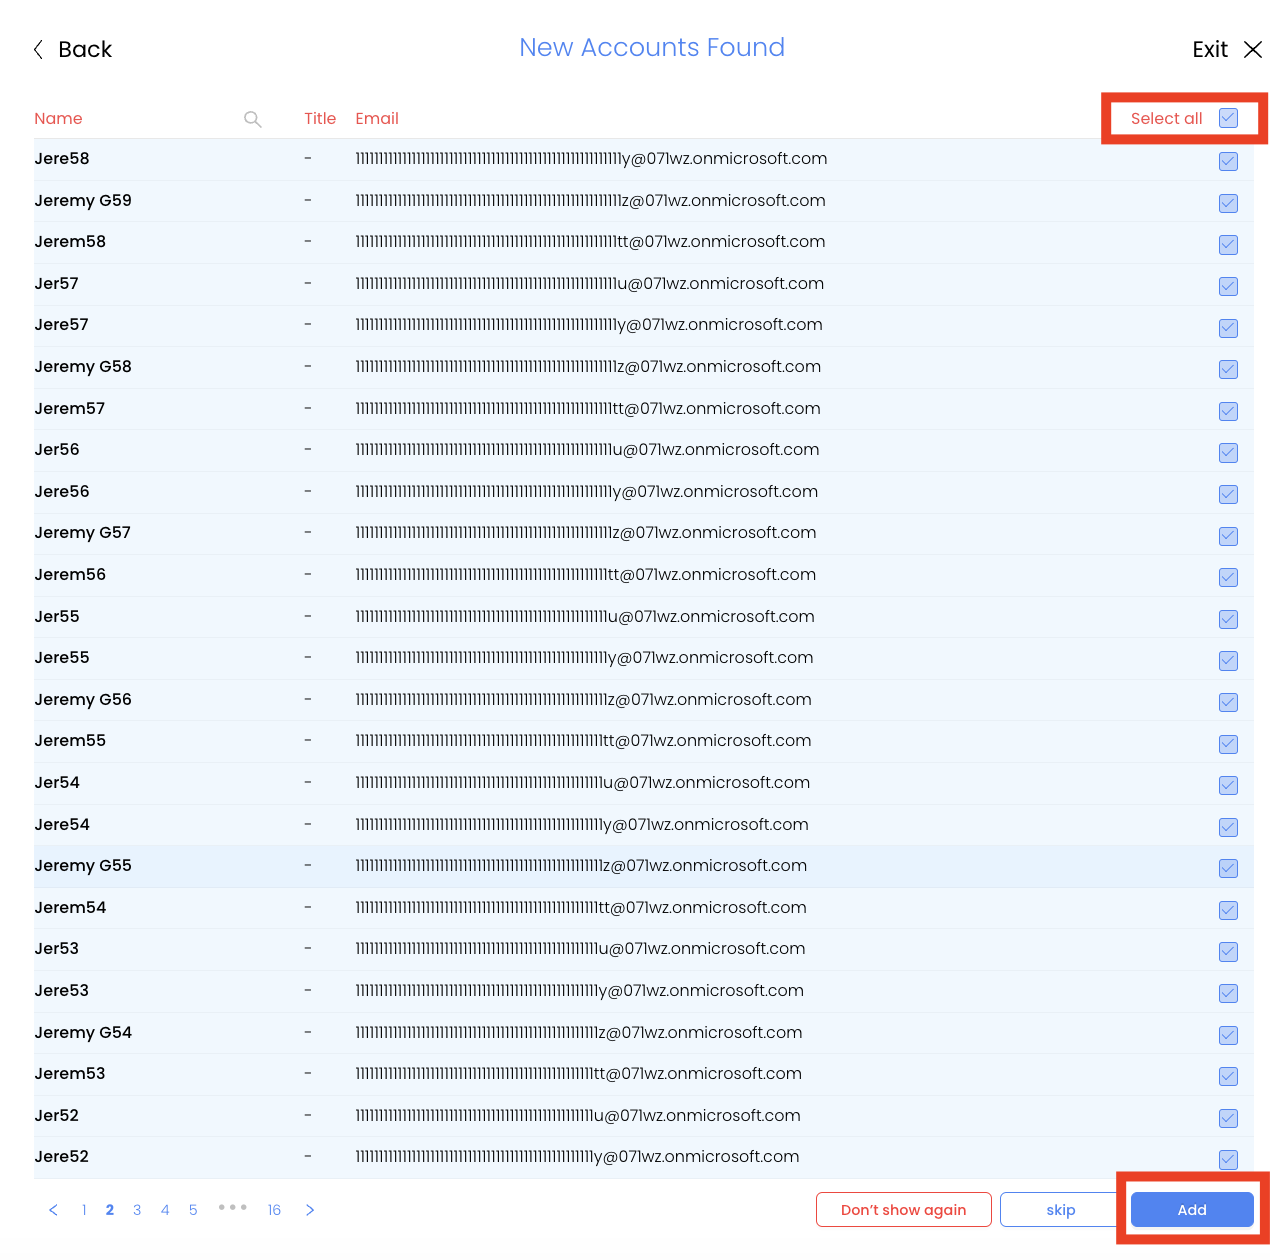
A new menu will open, allowing you to specify the type of card, licenses, and accessories for the selected users. You can also choose whether to provide them with login credentials for the app.
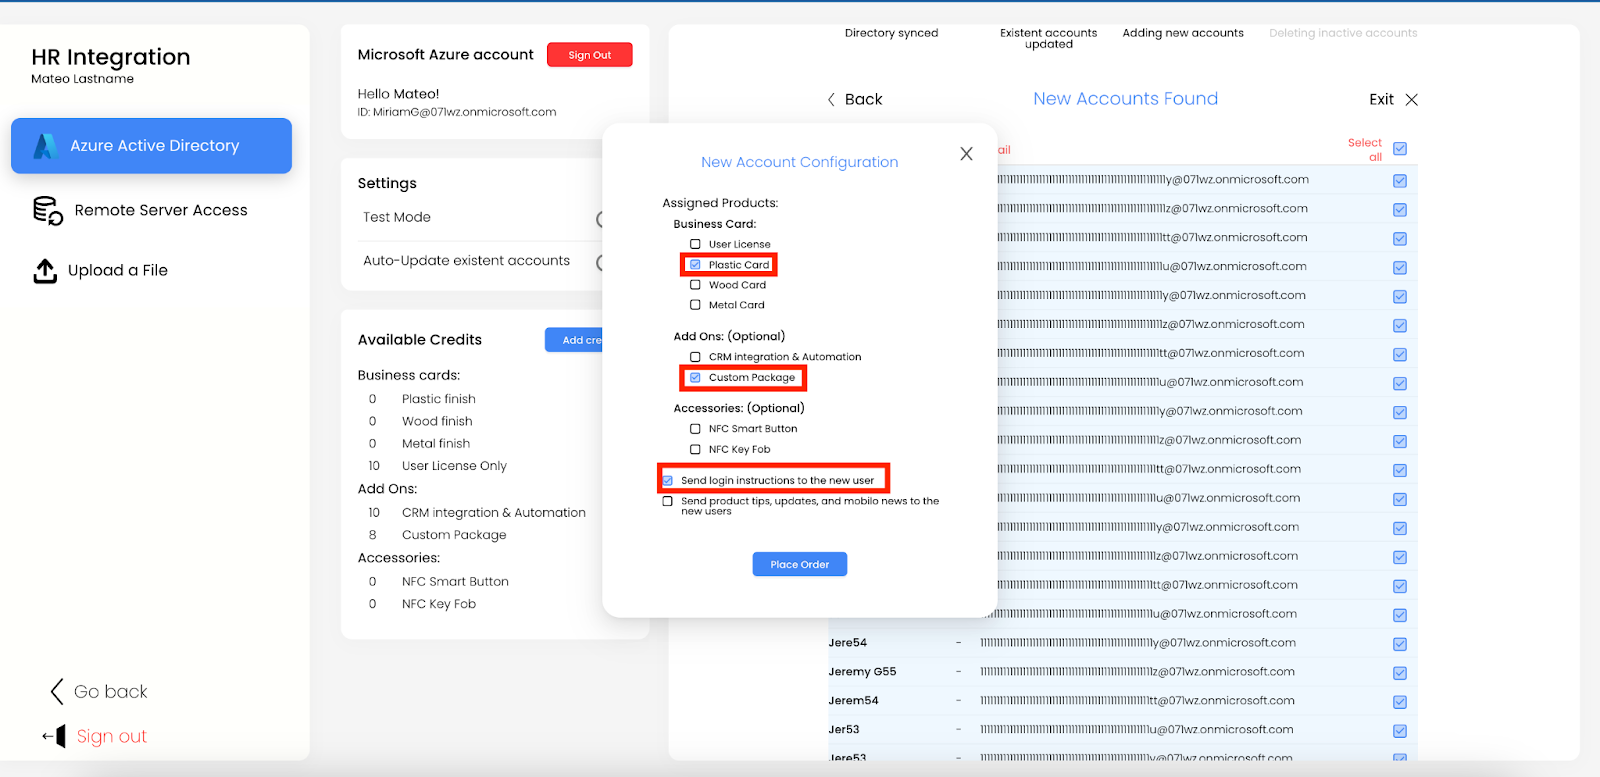
*Please note that if you select "User License Only," no physical cards will be ordered. Instead, our system will only create an account for the selected users on our app.
After finalizing your selections, click the "Place Order" button. Our system will create accounts for the chosen users and initiate an order for their physical cards.
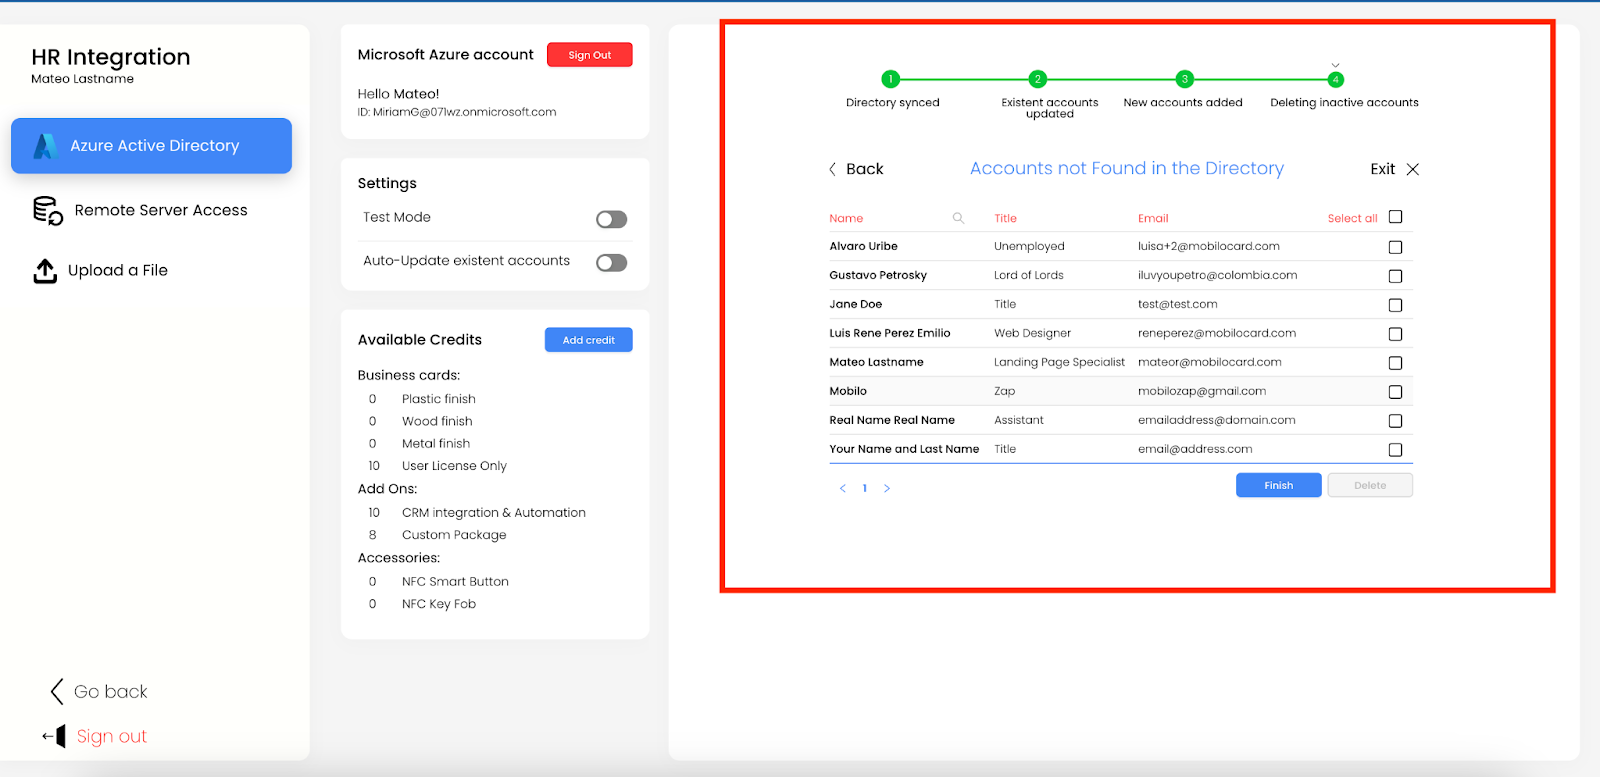
Step 8: Deleting Accounts
In this final step, our system will identify users who were previously removed from your directory (or selected security group) and delete them from Mobilo. Please be aware that this action will deactivate their cards as well, so if you want to keep using the cards, we recommend releasing or reassigning them before completing this step:
Select the accounts you wish to delete from Mobilo and click the "Delete" button.
Upon completing this synchronization, you will see the following confirmation message:
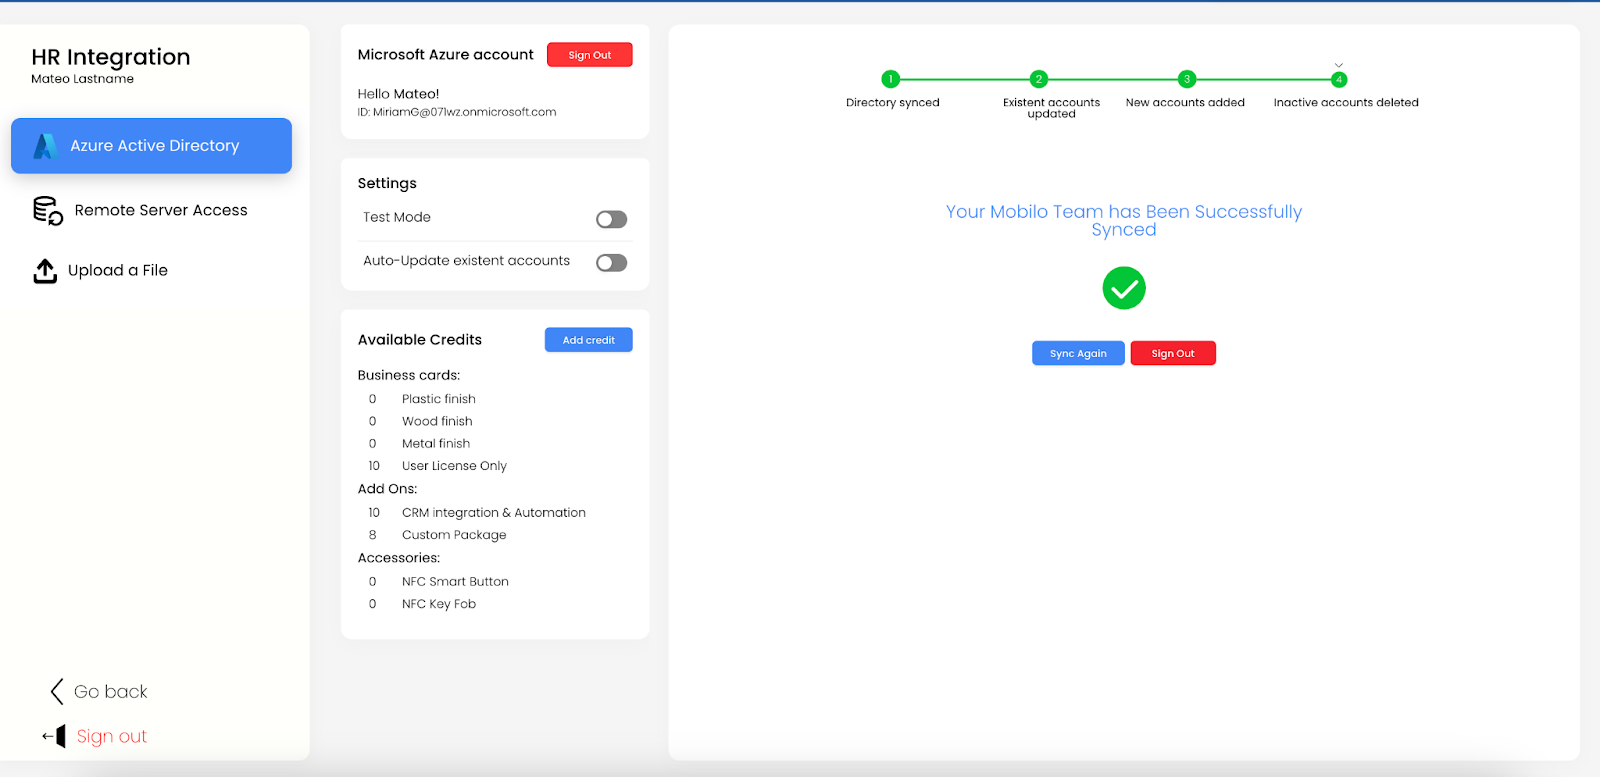
Congratulations! You've successfully created Active Directory integration in Mobilo for a streamlined card design process.
Need Assistance?
If you have any questions or inquiries, the Mobilo customer success team can assist you at support@mobilocard.com.
Get your digital business card today.
